Hello Guest,
 Isn’t it ironic that the last thing most people think of cleaning is the cleaning equipment itself?
Often these tools are used in direct contact with food preparation services, so from a food safety point of view, and also for getting the best life out of your equipment, knowing how to care for your cleaning tools will pay dividends.
I’ve noted four tips to help you keep your tools in top form, which will give you the following benefits:
a) Equipment will be kept in a more hygienic state for optimum food safety and peace of mind.
b) Your equipment will last far longer.
c) It will be easier to keep your tools clean and ready for use.
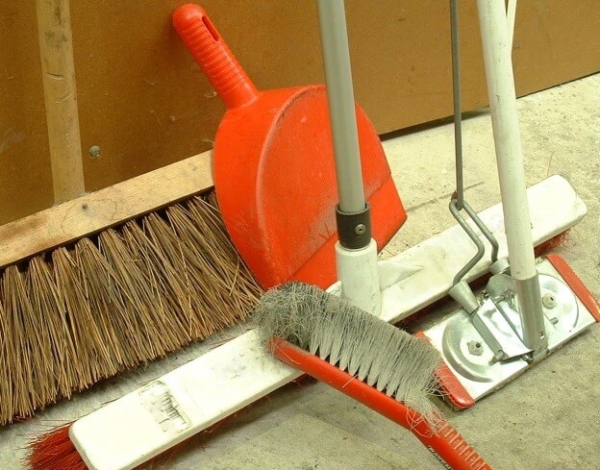
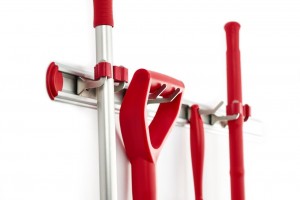
TIP 1 – Correct storage
If items are put into a plastic bin, bucket or onto a shelf with a lot of other items, it is less likely that the tools will be cleaned and sanitised before reuse. If they are out of sight and out of mind there is a higher risk of contamination, which can be transferred to the next surface you are going to clean. Even if the tool is clean but it remains damp in an enclosure, it creates an environment where bacteria can thrive.
If tools are not clearly visible, for example not hanging up on a rack, they are more likely to go missing, whereas it’s easier to keep account of tools if they are visible. Bristles will develop a ‘pressure set’ from whatever they are touching, therefore brushes need to be given their own space, such as being hung on a hook.
TIP 2 – Straightening of bent bristles
If you’re using a good quality brush with polyester bristles, they can normally withstand temperatures of up to 140ºC or so, which means that any brushes that haven’t been stored correctly, and consequently have a ‘pressure set’ on the bristles, can quite easily be remedied by pouring boiling water over them. This will actually straighten out the bristles, and make them like new again.
One large caution to this however is do not do this to cheap brushware, which is normally made of a nylon material. It will have the opposite effect and shrivel the bristles up, making the brush ineffective and a hygiene risk.
TIP 3 – Auditing and care guide
 Correctly storing tools the right way on the rack, and making sure there is no foreign matter risk, for example plastic slivers on the plastic tools and insuring brushes aren’t worn to the point of being ineffective nor become difficult to clean, are all good principles to abide by, however, in practice this may not be followed in a timely or consistent manner. Your supplier should be able to give you a ‘Cleaning Equipment Auditing and Care Guide’.
This is a document that includes:
The purpose of the audit: This is primarily for conducting regular audits on your cleaning equipment, to ensure that your gear is always in a safe condition to use and doesn’t pose a risk to product safety. This has the added benefit of avoiding wastage and saving money, by not having to replace as much cleaning equipment on an annual basis.
The scope of the audit: Lists all the different styles of equipment and demonstrates for each style, with pictures and text, how best to care for and audit whether your equipment is up to standard or not.
An example of an audit sheet: To implement as part of your audit plan.
A ‘how to’ care guide for different components before and after use: Including how to clean the equipment and how to launder the lauderable type gear.
Brush and broom compliance standards: A comprehensive list of all the compliance standards that the suppliers’ equipment will comply with, including overseas regulations.
This comprehensive document can be presented to any auditor, to show them how you are caring for and maintaining the cleanliness and integrity of your brushware, to a standard that meets or exceeds New Zealand and international requirements.
TIP 4 – Chemical sanitation or cleaning your equipment
Part of the document just mentioned should detail the cleaning and sanitation of equipment, which can be done in various ways, but here are three of the recommended options, and a note of what not to do.
For broom heads that may have debris caught in the bristles, DO NOT turn the broom head on its end and whack it on the ground, like a sledge hammer, as this will cause a lot of stress to the connections on the handle and could possible break the broom head. You’re best to pull out anything entwined in the bristles (likes of string) and any other debris can simply be hosed out or rinsed out. For these three methods of cleansing or sanitising, always start with the rinsing step:
Option 1: If all the equipment is held on a rack or a tool holder that is mounted to the wall, you can foam down or spray the equipment in place. When you are foaming the rest of the plant down, the last thing that you do is hang your tools up on the rack and foam the actual equipment and rinse off.
Option 2: You can soak the equipment in a large tub, something like an empty 200L container with the top cut off, for sanitising the equipment in a solution.
Option 3: For any food contact brushes, where the sanitation is critical, the option of putting these brushes through the likes of a commercial dishwasher is a quick and economical one. The dishwasher will clean and sanitise in a very short period of time. You can put a lot of brushes through a small commercial dishwasher and in a 3 – 4 minute cycle, brushes are cleaned and sanitised. At this point however if they are to be used in critical food contact areas, you will need to ensure that brushes are dried and stored in a secure plastic bag ready for next use.
In conclusion there are two resources we are offering that you can utilise:
If you would like 7 tips on how best to store your cleaning tools click on the button below to contact us and we will send this through.
If you are an existing Fibreclean customer and would like a full ‘Cleaning Equipment Auditing and Care’ manual that has been personalised with your company details, click “Email us” below and your account manager will get this to you.
